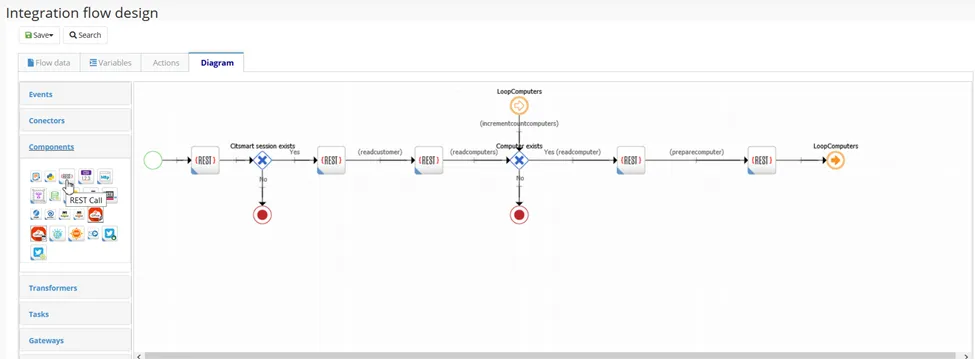
Introduction to CITSmart Workflow
Flows are visual representations of something that moves continuously. Therefore, flows can be used to graphically represent a process or any action. They can be materialized on paper (physical document) or an electronic tool. At CITSmart, the Workflow functionality is designed to model your business goals by outlining the steps you need to take to achieve those goals through a smart digital flow. It is possible to create workflows to assist with the management of services, problems, changes, releases, continuity actions, travel requests, and purchasing. Moreover, the workflow has interaction with the main CITSmart processes.
Automated workflows bring system activities to life, enabling your organization's activities to be digitized and automated. Furthermore, you can create task-controlled flows, add notifications, subprocesses and establish direct communication with other applications, such as Neuro - which is a framework for the creation of applications.
You will find that everyday tasks such as ordering something, registering a ticket, and approving a request can be done quickly and intelligently, avoiding the waste of time. CITSmart flows help you to materialize your business processes into a systemic view where you have complete control of what happens.
Meeting the Workflow Functionality
First of all, you need to familiarize yourself with the basic concepts, business rules, and user interface. The visualization of this functionality in the CITSmart menu depends on permissions assigned to an access profile, make sure you have this permission. If you don't have this access, a manager can grant this access for you.
To find out if your profile has this permission, access the menu on the left side of the screen, and make sure the first access option is the main menu Workflow;
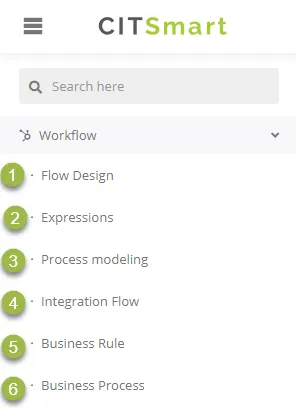
System standard
1: Creating a Workflow;
2: Building Expressions;
3: Process modeling;
Neuro Integration
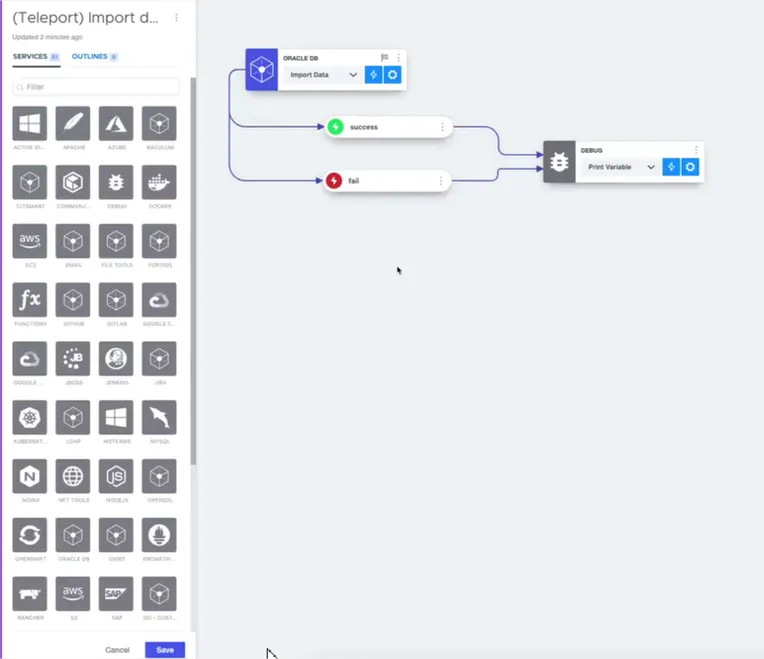
4: Integration Flow;
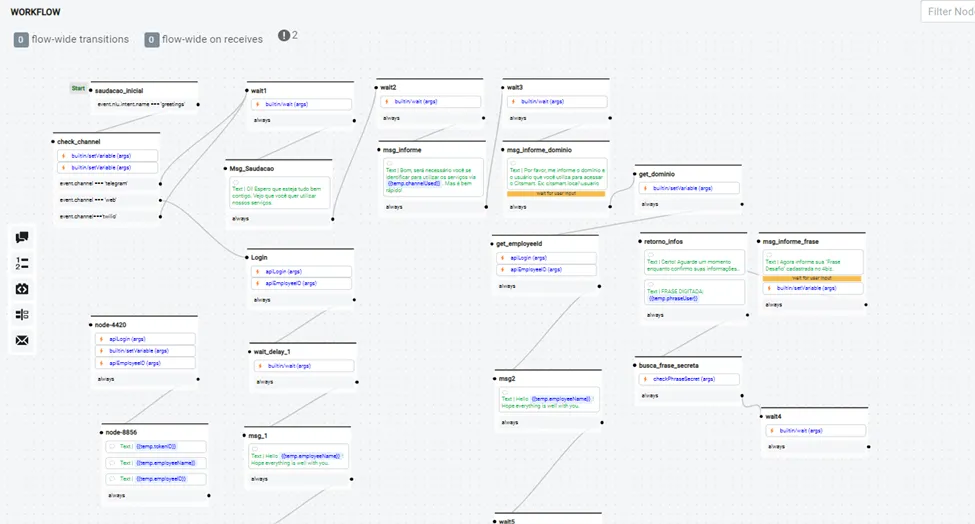
5: Business Rules;
6: Business Process;
NOTES:
These items will only be available when the Neuro application is enabled in your instance;
If you already have this access, click and select the option Flow Design to display the management screen.
Flow Management Screen
In the Flow Management Screen you can: create, edit, export, and delete a Flow.
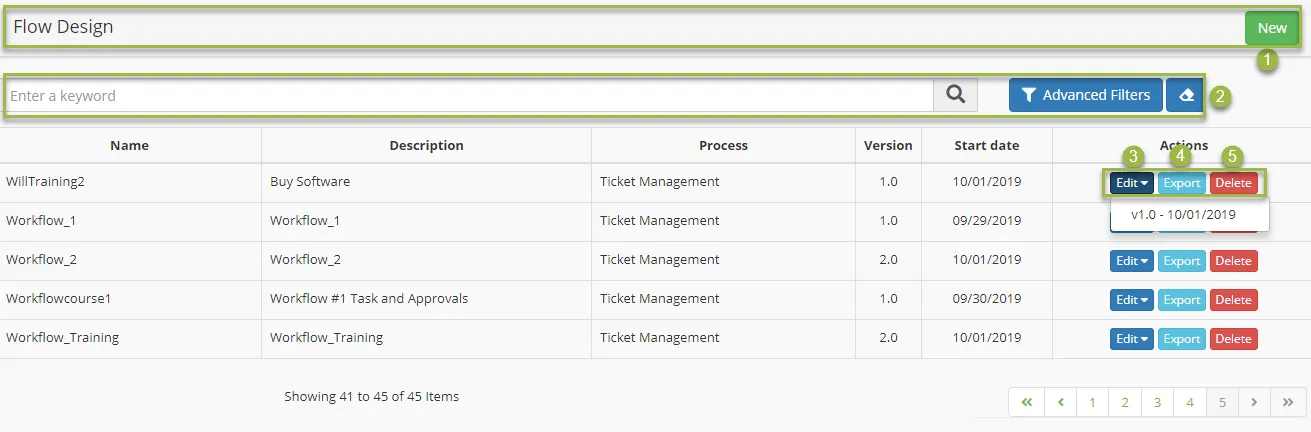
1: New - click on it to start a new flow project;
2: Search field - it searches for a flow by its name or part of it;
3: Edit - click on it to edit a flow, being possible to choose which version you want to edit;
4: Export - it creates an exportable document in JSON format;
5: Delete - click on it to remove a flow;
Creating and Editing a Flow
By clicking on New or Edit you are taken to the Workflow creation/editing interface, which consists of two tabs: the Flow Data where you will enter identification data, and the Diagram tab where you can draw the flow.
In a new flow, you will find four buttons with the functions of import, save, clear, and back, you can import a flow (previously exporting in JSON format).

If it is about the edition of an existing flow, the buttons are modified by adding the option Create Documentation and the change of Import by Save.

Flow Data Tab
Flow Data is a tab for flow identification, where you can structure names for a better experience:
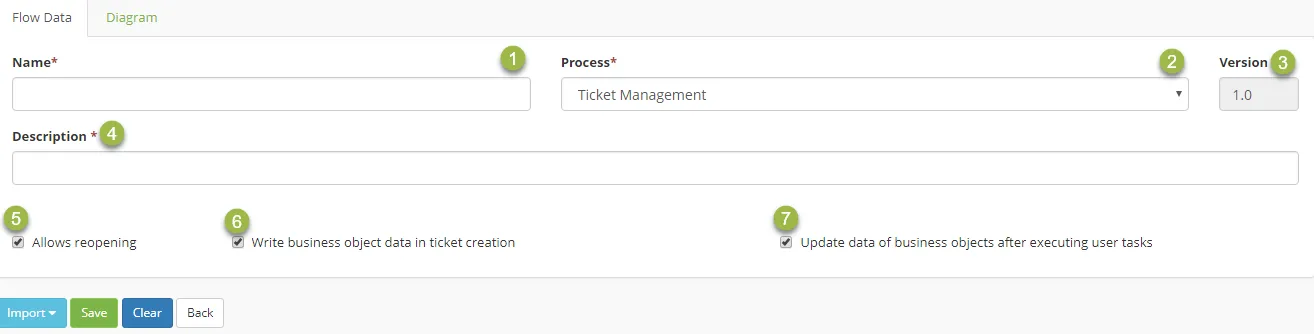
1: Name – Assign a name to the flow identification so you can identify it in case of linking or assignment;
2: Process – Assign to the flow one process among all those in CITSmart so it's better defined and identified;
3: Version – Viewer of the current version of the flow opened;
4: Description – Assign a flow description for easy understanding;
5: Allows reopening – Option to allow activities that are linked to this flow to be reopened regardless of group settings;
6: Write business object data in ticket creation – Option that allows to create or update business object data configured in our Neuro language when creating a ticket;
7: Update data of business objects after executing user tasks – Option that allows you to update business objects created during the execution of user tasks.
Diagram Tab
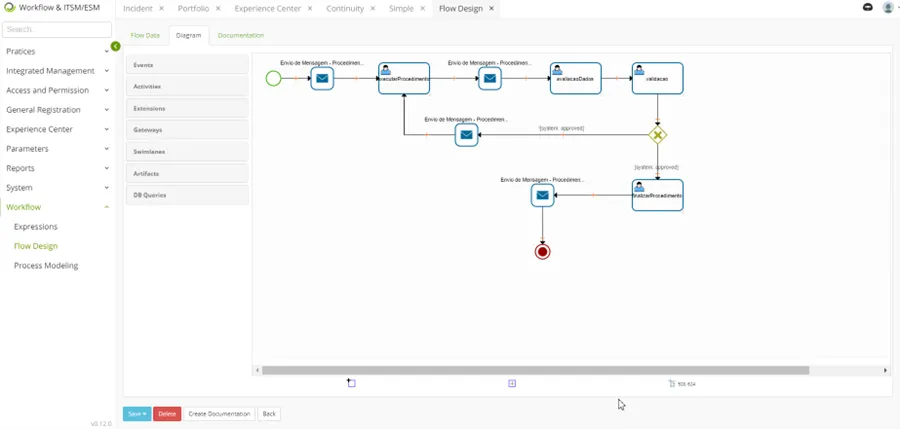
In the tab diagram, we find several Elements for the construction of the flow grouped into Events, Activities, Extensions, Gateways, Swimlanes, and Artifacts. These are several components for better construction and interaction of workflow. Below there's an example of a flow being created.
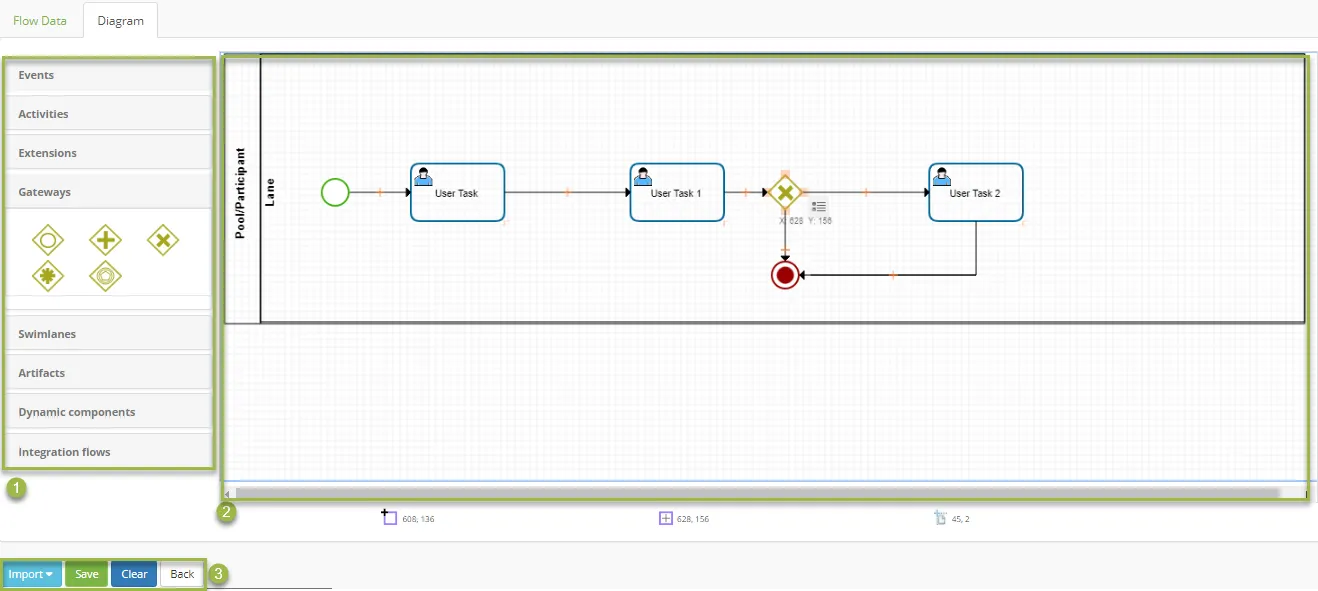
1: Elements – These are sets of items/tools to be used in the flow designing as explained in the Basics Concepts item;
2: Designing Area – A place for workflow design and construction;
Documentation Tab
In the Documentation tab, you will be able to generate a document with all the information of the flow designed - the description of the elements used in the workflow and the documents linked to the flow - being able to export it to PDF.
And now, what should I do?
Now you can create a workflow, think about a business need and the actors involved on it. Take a look at our documentation, it will help you on this journey.
The platform provides advanced analytics and integrates, using workflows and automation, with external tools to help estimate/predict recovery time objective (RTO) and recovery point objective (RPO) for different disasters. So in this way, the platform can assist in the development of service continuity plans.
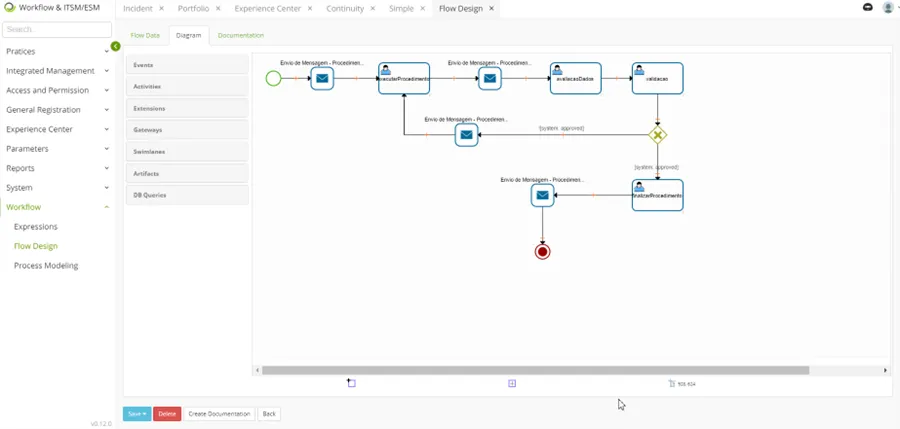
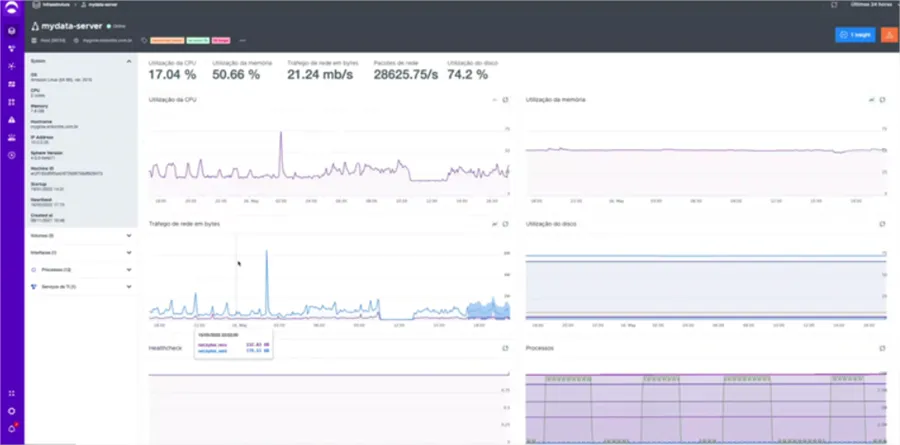
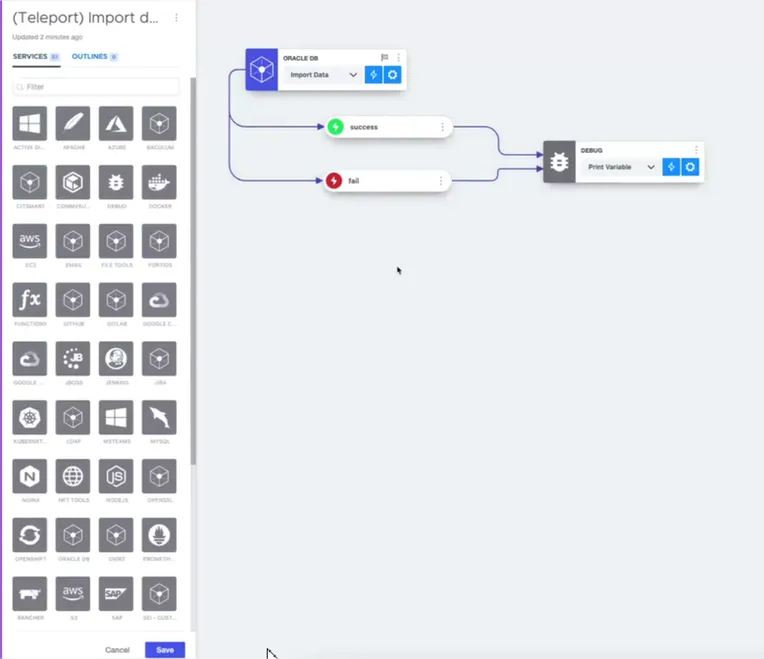
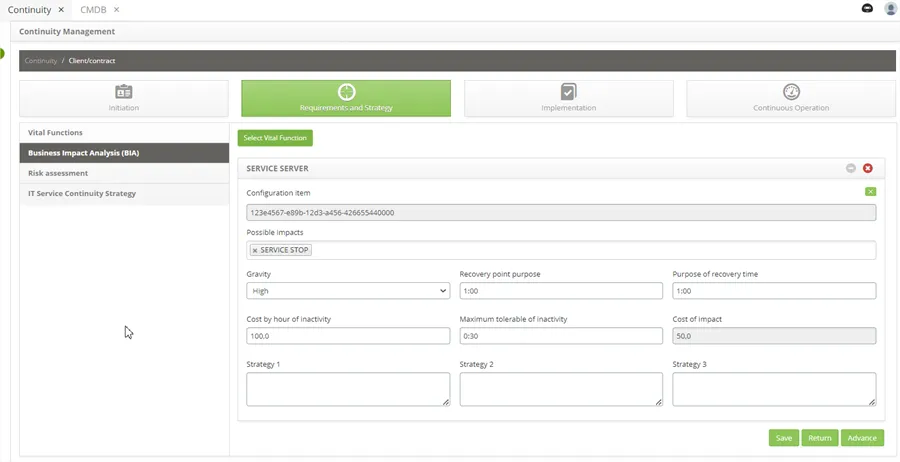
Through integration with external tools via workflows and automation, the platform provides advanced analytics to help estimate/predict the maximum acceptable outage (MAO) for different disasters, aiding in business impact analysis. We can check using the system (BIA) as well.