Steps to Implement Neuro Solution
5 min
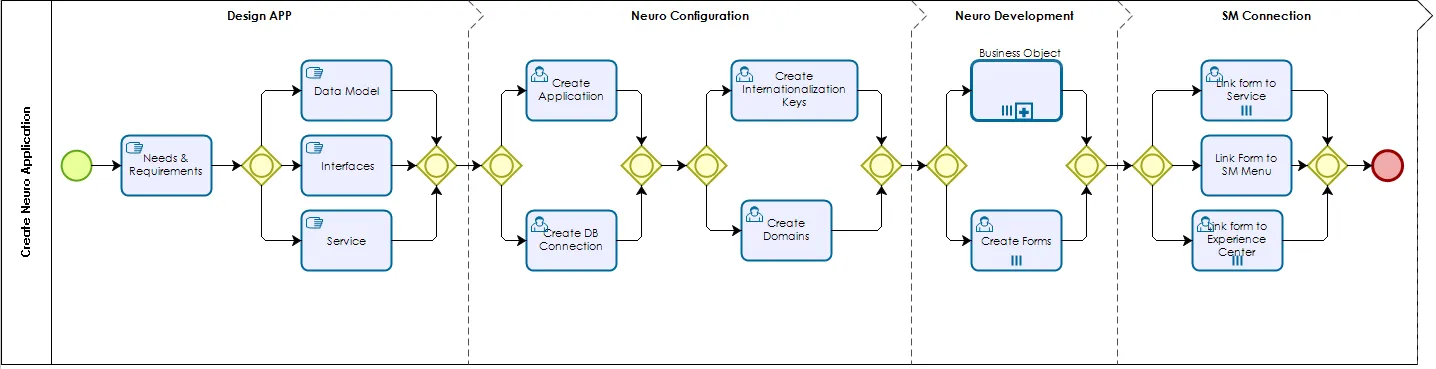
Figure 1 - Create Neuro Application
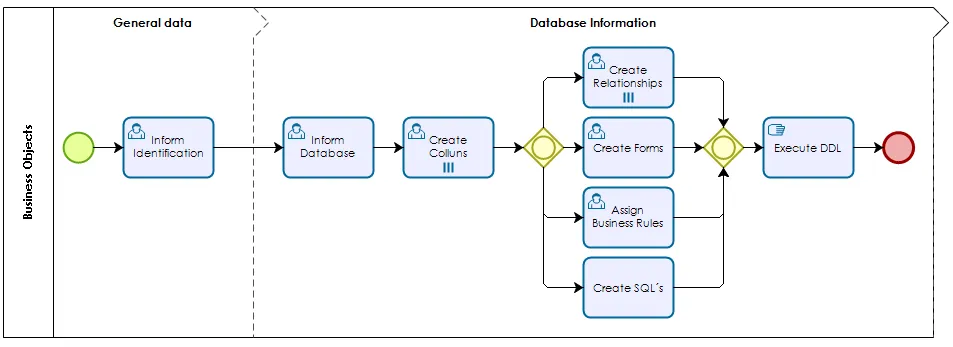
Figure 2 - Business Objects
ATTENTION:
The steps can be found in the CITSmart documentation (docs.citsmart.com).
Design App
For better development of Neuro applications, it is good practice a previous design of needs and requirements that the application will meet, also include the entities model of the data that will travel through the application.
A research of the desired interfaces and, if the Neuro will be the option to use data for services, the design of the services that will be automated.
Neuro Configuration
After Designs, the Application gathering the information regarding the data entities of your Neuro Application you will:
- Create your DATABASE CONNECTION and your NEURO APPLICATION entry;
- Verify if you will be going to use any common DOMAIN for your installation and create if it is necessary;
- You will, also, verify the BUSINESS RULES for the registration, update or deletion of records in the data entity… you will link those to the Business Object;
- If you will have forms that will use multiple languages you will create the INTERNATIONALIZATION KEYS, labels that will be used for all fields in your forms.
Neuro Development
The configuration step will make us ready to develop the application:
- Create the BUSINESS OBJECTS, containing the data structure of the entity, at this step, you will be able to create the columns, PK's and FK's (assign relationships), link Business rules and Domains you will be able to create CRUD forms and other features;
- Create FORMS related to your Business.
CITSmart Experience Connection
After you have your Business Objects and Forms created you can:
- LINK THE FORM TO A SERVICE as needed, or
- LINK THE FORM TO CITSmart Experience MENU OR TO AN EXPERIENCE CENTER, this will make you able to maintain tables and additional data that will be not used on a ticket opening.