Creating Ticket
Creating a ticket means opening a call within the system, with the possibility to monitor its attendance history with a view of all actions sent to it.
Before getting started
It is necessary:
To have permission to access the desktop of the Service Desk;
To have a catalog of services registered and configured (Portfolio, services, activities, groups, flow, SLA linked to the contract);
To have permission for the group linked to the service catalog to view and register.
Procedure
- Access the main menu Processes > Ticket Management > Ticket;
- Click on "Actions" and then on "Register";
- Enter the requester's data;

- Full name – of the requester;
- Email – of the requester;
- Unit – where the requester wants attendance;
- Requester history – it presents all the requester relationships with the ticket;
- Satisfaction;
- Phone – of the requester;
- Edit – it allows to edit the name, e-mail, phone, and unit of the requester;
Selecting the Service
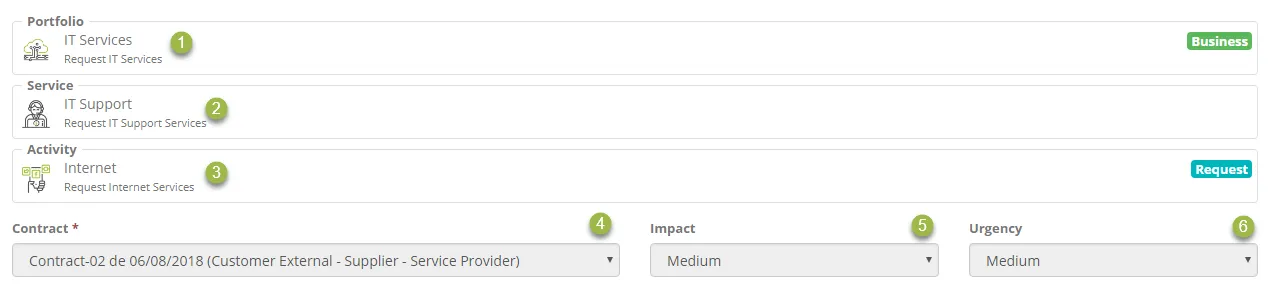
- Portfolio;
- Service;
- Activity;
- Contract – Linked to the portfolio;
- Impact – of activity;
- Urgency – of activity;
Describing the Service
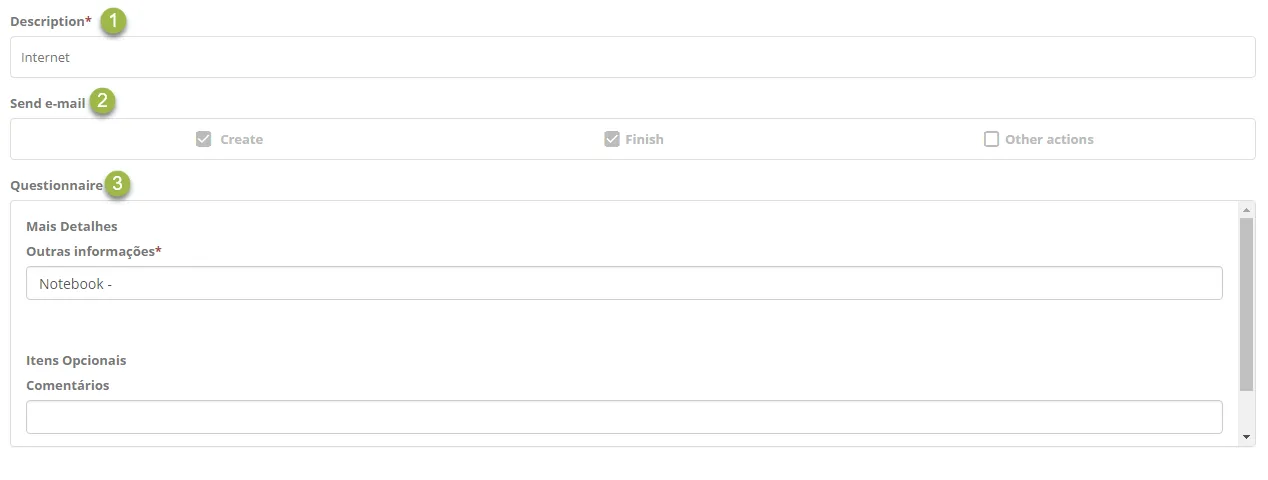
- Description – space to describe the need for the ticket;
- Send Email – it is possible to select which types and email the user will receive;
- Questionnaire – information that complements the understanding/purposes of the service;
💡 Tip: The "Description" field is the space for the ticket information to contain words that refer directly to that service, being objective and easily associated with the request theme.
This content is linked to the "Keyword" field and to its search return, which exists within the advanced search mode of a ticket. In addition, it is possible to include attachments of various formats (eg.: .pdf, .doc, .png, .jpg and others) to assist in the service process.
The format limitation is set by the system manager.
Linking Additional Items
Access the small black button on the upper right side of the screen. Below are the menu bar, to view and interact with the desired functions.
- Knowledge
- Project;
- Schedule;
- E-mail reading.
- IT Options
- Requester CI;
- Release.
Saving Request
At the end of the page, you will find a floating button with the functions of:
- Back – to get back to the desktop of the Service Desk;
- Save – to save the ticket and create the number for tracking and monitoring.
When creating the ticket for attendance, the user will see a new option (located at the top side of the screen) called Layout, this option allows the user to parametrize how the screen will be presented to the attendant, who can choose from the following possibilities:
30X70 - The system divides the screen into two parts, the left side will show 30% of the screen and the right side 70%;
50X50 - The system divides the screen into two parts, each side (right and left) will display 50% of the screen;
100% - The system presents the screen without division.
4. Complete the other necessary data.
🖊 Note: In this version of the functionality, on the right side of the screen, you will see the Toogle, which allows the side menus (formerly on the left side of the screen) to expand or reduce as needed.
What to do next
View in the ticket pane listed and check the information registered.