Agility Installation Guide
Prerequisites for installation
FrontManager installation
Configuration of tenants and applications
Central IT infrastructure access data (git credentials, nexus credentials)
kubectl configured for the environment where it will be deployed (this includes the project's environment variables, with their appropriate access data).
Tools
- Database (PostgreSQL 13+ / SQLServer 2019+ / Oracle 12c+)
- KeyCloak (must already be installed as FrontManager depends on it)
- MiniIO (must already be installed as FrontManager depends on it)
- Kafka (must already be installed as FrontManager depends on it)
Installation steps
Steps to install Agility:
- Clone the hyper-kanban-api repository
- Enter the folder where the project was cloned and check out the devel branch
- Run Step 1. Migrations
- Run Step 2. Deploy
Step 1. Migrations
The migrations.sh script processes migrations for multiple databases according to the settings present in a migrations file in json format which by default is migrations-config.json in the same folder as the script.
Migrations-config.json file
The file must follow the structure below:
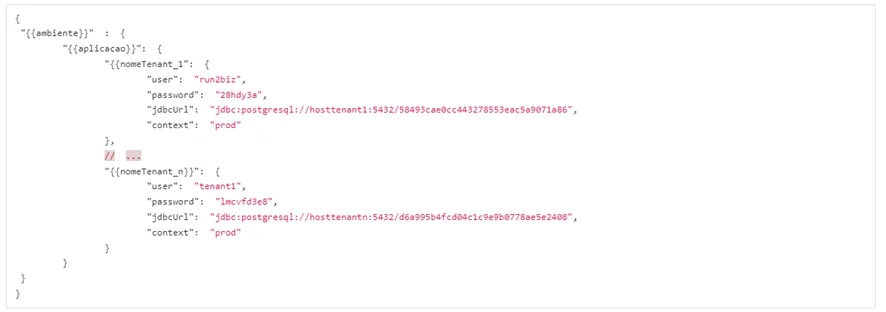
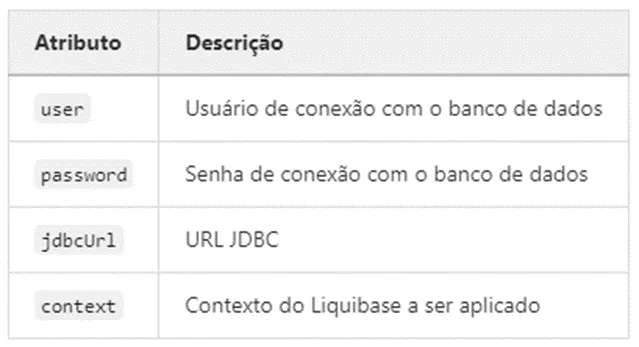
Where the attributes of each tenant that follows:
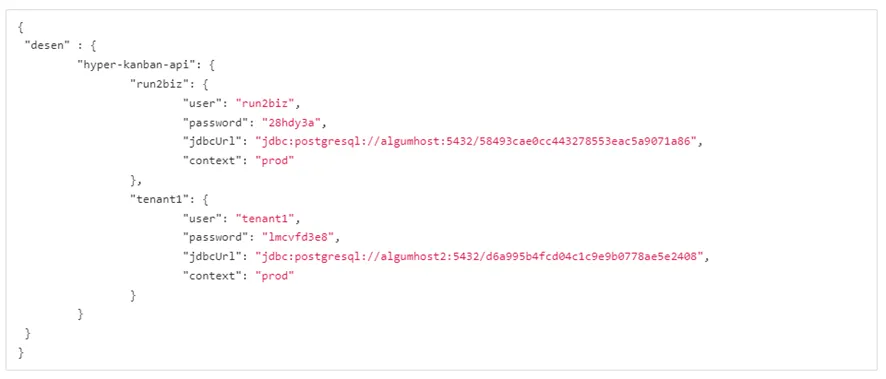
Example
Example file with two tenants (citsmart and tenant1) for the hyper-kanban-api application development environment (this application).
Running the migrations.sh script
How to use
Example
Step 2. Deploy
Via gitlab CI
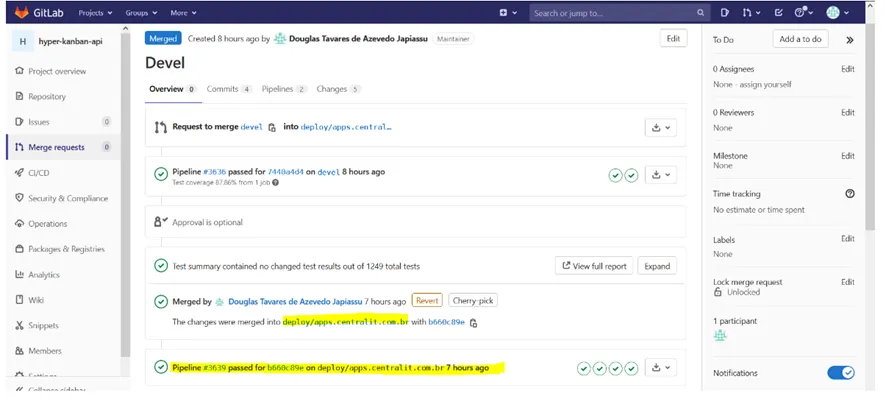
For some environments, there is already automation in gitlab, where simply merging to the branch already triggers the deployment of the product (apps.centralit, labcentral). These are the cases of branches with prefix deploy/
Gitlab CI example on the deploy/apps.centralit.com.br branch
Manual via kubectl script
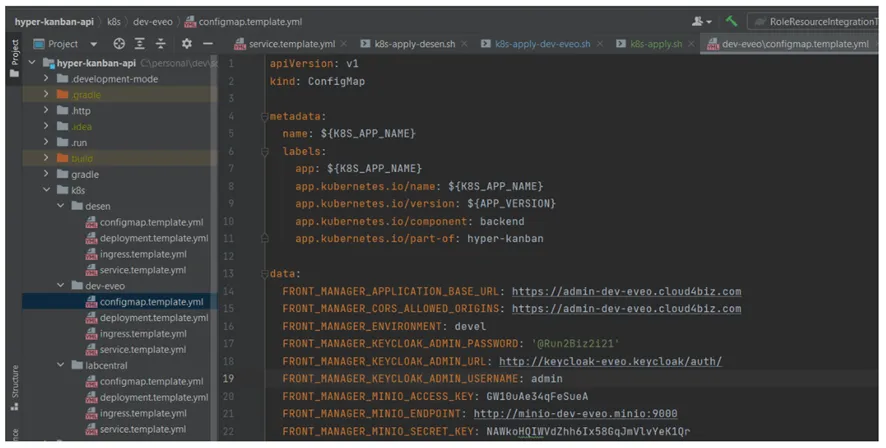
To do it manually, the template files for the environment in question must be created:
configmap.template.yml
deployment.template.yml
ticket.template.yml
service.template.yml
In this case, the only file to be updated would be the configmap.template.yml (environment variables), the rest of them follow the same pattern and content. The files must be created in the k8s folder, in a new folder named after the environment. After that, the k8s-apply.sh script must be executed passing which environment will be updated with deploy. Ex: k8s-apply.sh dev-eveo
Updating directly in Rancher
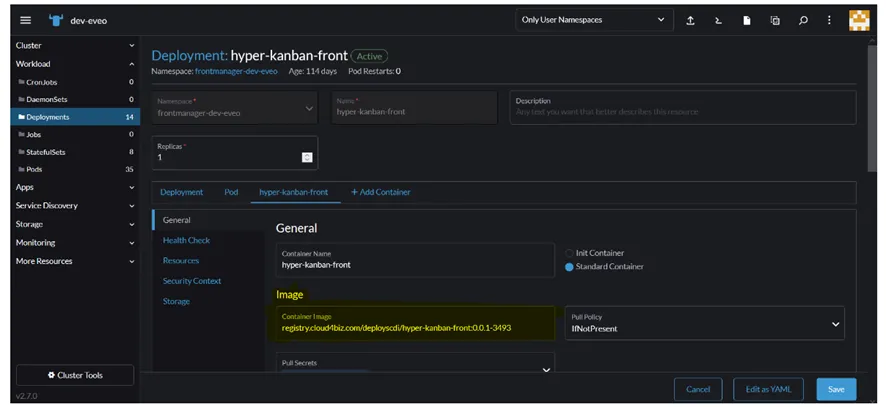
In cases where the Kubernetes environment already exists and it is only necessary to update the package, just change the package path to the one available in the registry.