Business Object
The Business Object is a Database Abstraction Resource. The Business Object will represent the data model and can reach one or more forms.
Each created business object represents a table in the database. This is the application layer responsible for connecting to the Database, which will query, write, update, and delete data (CRUD).
Communication of the BUSINESS OBJECT is done through the DATABASE CONNECTION, and communication with the form is done through REST API calls, sending and receiving data in JSON format.
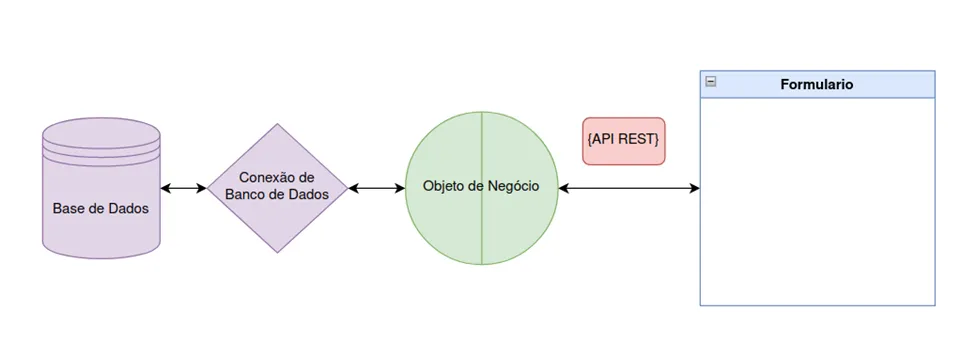
The creation of a BUSINESS OBJECT has three groups of information: Identification, Database, and Form.
Procedure
Access the functionality through the navigation menu Low Code > Management > Business Object;
Click on "Create";
Fill in the available fields in the "Identification" tab;
Select the Project for which the business object is created, assign a Name and a Description to the Business Object, and also provide the Purpose of the Business Object.
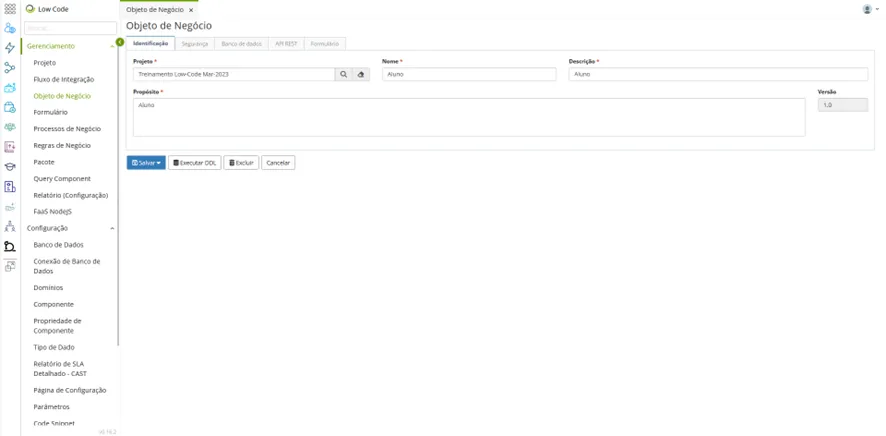
Database Information
Fill in the available fields for the "Database" tab. This tab refers to the application's database structure. As each business object represents a database table, this tab defines the database columns, as well as their relationships, business rules, and SQL commands (if necessary).
In the Database tab, it is mandatory to select the DATABASE CONNECTION, the type (in this example, it's a table), and the name that the table will be called in the database.
Fill in the information with:
- The created Database Connection,
- The Type, whether it's a table or view, and
- The Name in the Database of the business object (the table name).
Columns
In the Database section, it is also important to add fields. If the table already exists in the database, you can use the option: Fetch columns from the DB. In this case, you must provide the name of the table in the database.
Add the table columns, indicating:
- Provide the column name in the DB;
- Select the Column Type. The system will automatically correlate it to the Type in the DB;
- Give a Name for the object attribute; if you don't change it, it will have the same name as the column name;
- Configure the Label for the form and the grid;
- Select the Primary Key if the column is the primary key for the table;
- Select Mandatory if the column is mandatory;
- Click on "Save".
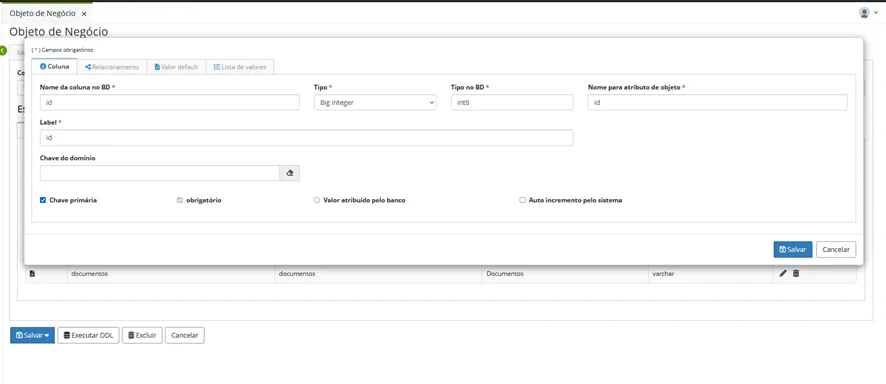
🖊 Note: After "Save", you can enter the domain key, if any, and enter and assign the relationship, if necessary.
After creating the fields, just save and execute the DDL to create the table in the database, if it doesn't already exist in the Database.
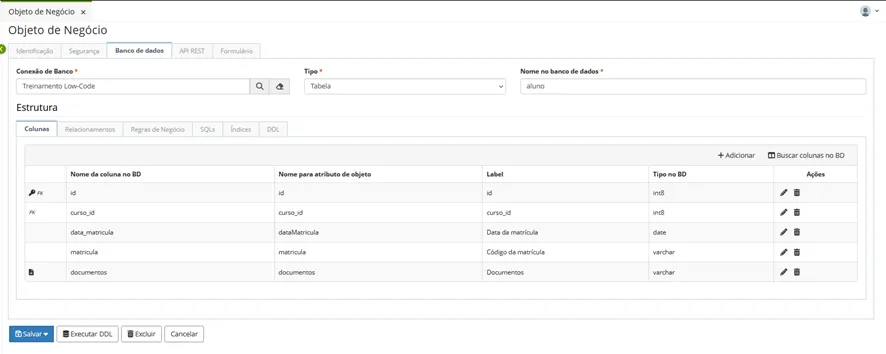
🖊 Note: After executing the DDL to create the table and fields, at each punctual inclusion/exclusion of fields, you must execute the corresponding DDL to execute the creation/change in the Database.
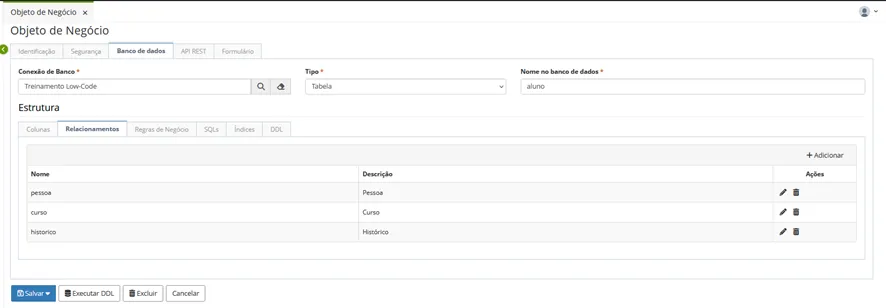
Relationships
If necessary, you can add relationships in this tab;
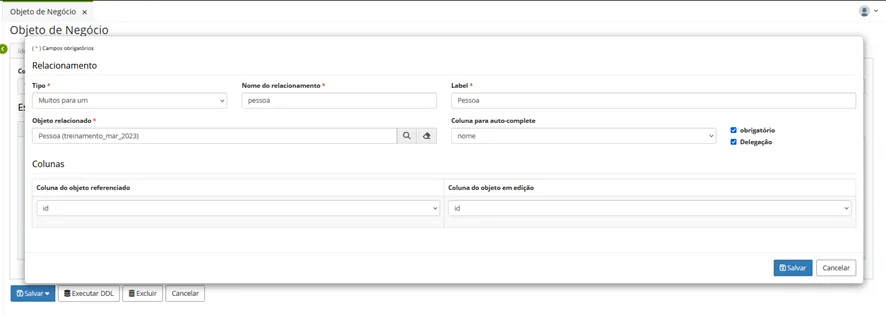
Click on "Add" and define:
- Type (1 x N, N x 1);
- Provide the Relationship name and Label (for the form);
- The Referenced object to be linked;
- The Column for automatic filling;
- Configure if it's a Mandatory field;
- Use Delegation when you want to use Generalization/Specialization concepts for the Relationship;
Business Rules
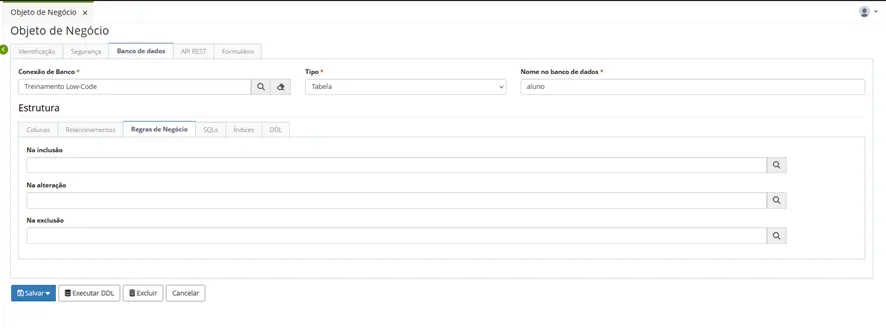
You can also add BUSINESS RULES for the actions of adding, updating, or deleting records in the data entity. You can link these rules to the Business Object by adding Dependencies available in the Form.
Select the Business Rule for the type of action you want to assign. The rule can exist for Inclusion, Alteration, or deletion in the Business Object action.
Creating Business Rules
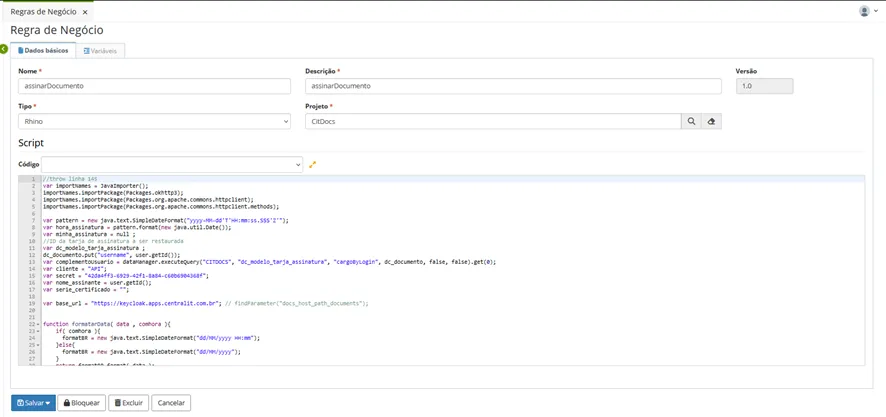
To create a Business Rule, you must provide a Name, Description, Type, and Project name.
Example of a business rule that validates information:
SQLs
You can create SQLs related to the business object to be used in the project, for example:
In a situation to query a group of records, you can create an SQL (considered as a function) to retrieve the required record sets, passing parameters in the query ${value}. To add an SQL, click on "Add".
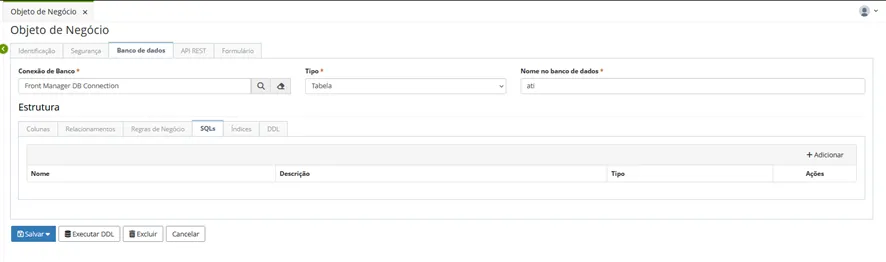
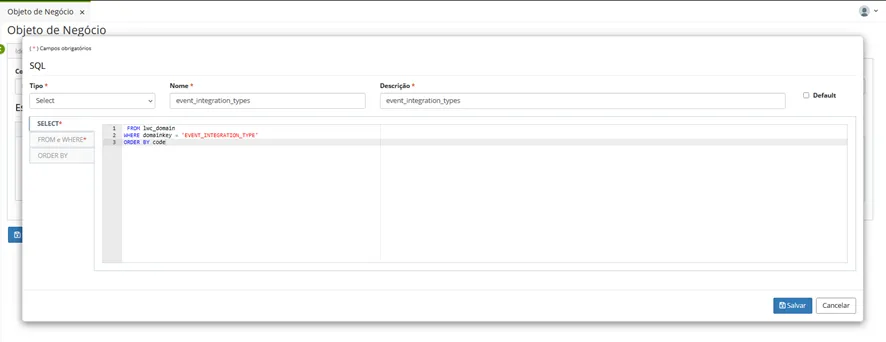
Form (CRUD & Customizable)
In the Forms tab, there are several options: Labels, Grid, Screen Design, Html, Controller, and Dependencies, which exclusively handle the resources used in the form. Each item can be explored in specific courses on tool manipulation. We will cover only the Grid and the Screen Design.
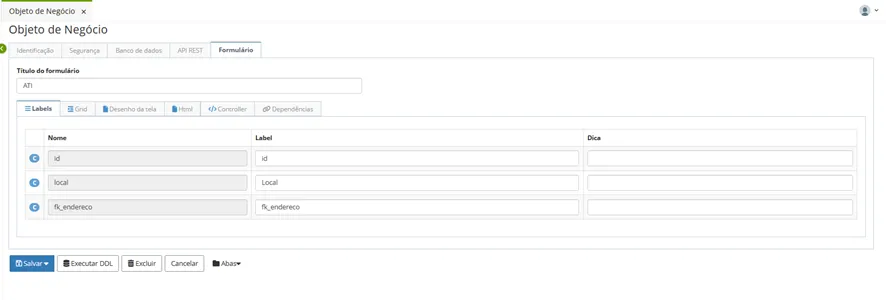
In the Grid, you can add the fields that you want to be displayed. Select the fields and click on "Include selected". You can add all fields at once or select specific ones to be included.
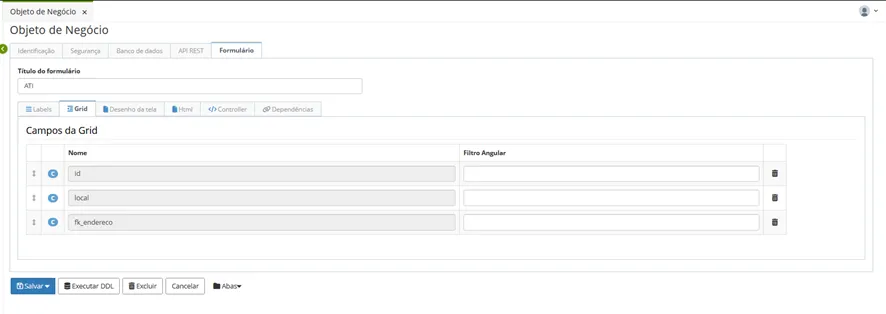
In the Screen Design, you can choose the fields to be added to the form, such as input objects, for example. Just like in the grid, you can add all fields at once or select specific ones to be included.
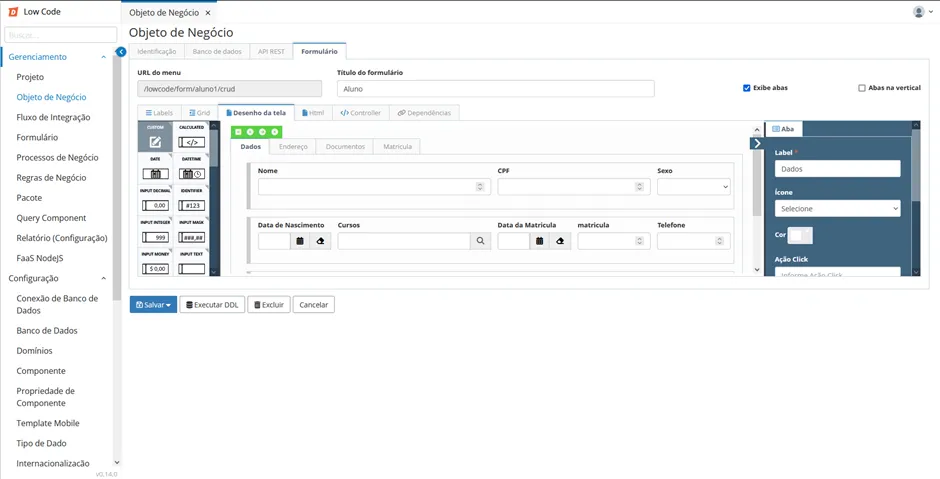
After each step, click Save and, lastly, Save on the BUSINESS OBJECT.